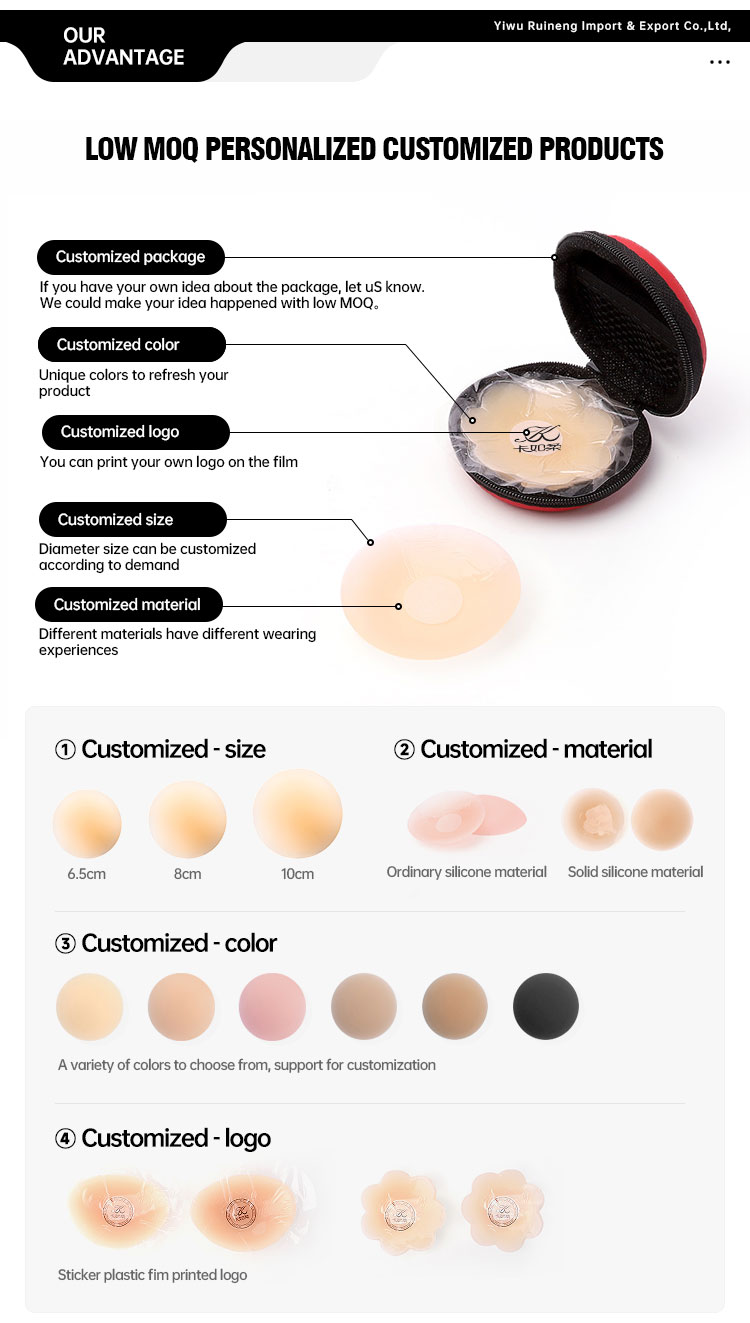
Solid Silicone Nipple Covers


Main Functions:
-
Nipple Concealment
Prevents nipple show-through, creating a seamless silhouette under clothing. -
Shaping Support
Offers light shaping and coverage, helping to maintain a clean, rounded appearance of the breast area. -
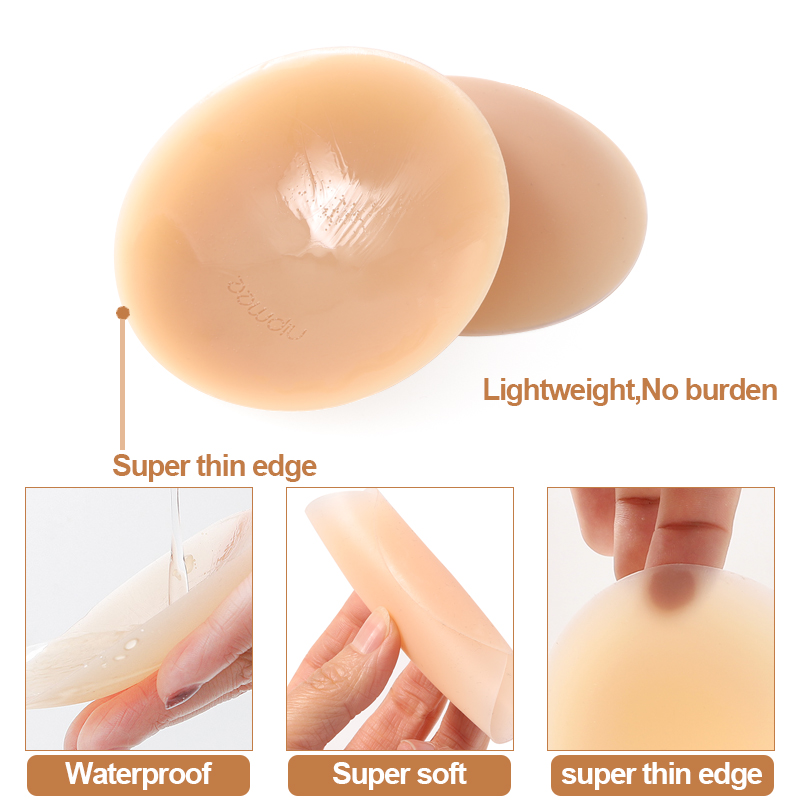
Reusable & Long-Lasting
Made from solid silicone, they are washable and designed for multiple uses — more durable than thin or fabric-backed alternatives. -
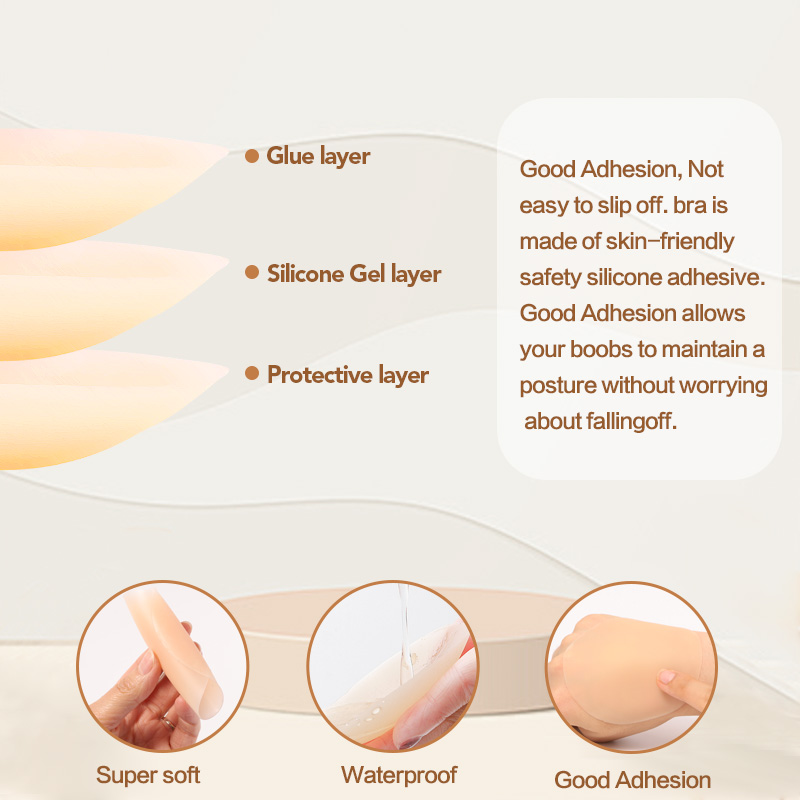
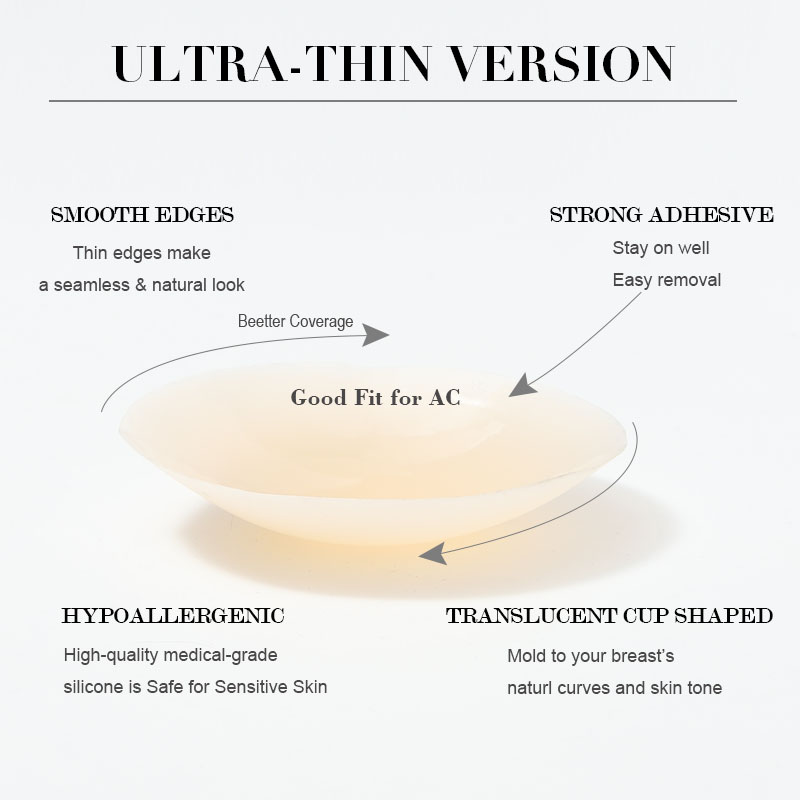
Comfortable Fit
Skin-friendly silicone adapts to the body’s shape and stays comfortably in place.
Product details
|
Product Name |
|
|
Place of Origin |
Zhejiang,China |
|
Brand Name |
RUINENG |
|
Feature |
Quickly dry, Seamless, Breathable, Push-up, Reusable, Gathered, Opaque |
|
Material |
Medical silicone glue |
|
Colors |
Light skin, dark skin, champagne, light coffee, dark coffee |
|
Keyword |
nipple cover |
|
MOQ |
3pcs |
|
Advantage |
Skin friendly, hypo-allergenic, reusable |
|
Free samples |
Support |
|
Bra Style |
Strapless, Backless |
|
Delivery time |
7-10days |
|
Service |
Accept OEM Service |


How do you use invisible adhesive bras?
1. Make sure your skin is clean, dry, and free of creams or moisturizers.[1] If you’ve just showered, you should be good to go as long as you haven’t applied any products to your skin. If not, go ahead and use a washcloth with warm water and soap to quickly clean your chest and prepare it for the sticky bra’s adhesive.
(Make sure to dry off completely before applying the bra—the adhesive won’t work if your skin is wet.)
2. Separate the cups for accurate placing if the bra has clasps in the front. Many sticky bras have a clasp or ties in the front, though there are also options that are made of one continuous piece of material. If yours has a clasp in the middle, go ahead and undo it so that you have two separate cups to work with—this way, you can take your time getting each one into exactly the right position.
a). Always check the instructions before putting on your backless bra. Each brand may have a slightly different method for making it stick the best.
b). Work in front of a mirror so you can easily see what you’re doing. If you’re new to wearing a backless bra, it can feel a little weird at first when you try to put the cups on.
3. Remove the plastic backing to expose the adhesive. Locate the edge of the clear plastic film that is protecting the bra’s adhesive from getting stuck on other things. Peel away the adhesive, but don’t throw those strips away! Put them to the side to reapply later and keep your sticky bra in good condition.
a). If you need to set the cups down, make sure to put them adhesive-side up.
4. Flip the cups inside out to apply the bra without air bubbles forming. Simply pop the cups so that the adhesive is sticking out and the front side is concave. When you go to apply the cups, it’ll be much easier to get it to lay flat and adhere completely to your skin.
a). If you have a two-piece bra, focus on doing on cup at a time.
b). Before you move on to attaching the bra, consider placing tissue paper or pasties over your nipples if they tend to be sensitive. When you remove the bra, the sticky adhesive could be painful as it pulls on your nipples. Tissue paper or pasties will keep the adhesive from attaching and alleviate some of that sensitivity.
5. Place the bra over your breast and smooth it upward and outward. Place the cup so that the middle is centered over your nipple. Attach the cup to your breast at the bottom-most point, and then slowly smooth the rest of the cup upwards over your breast, using your hand to push the material flat against your skin. Avoid putting the bottom of the bra under your breast—you may be tempted to replicate the look and feel of a traditional bra, but most sticky bras need to be set up differently to provide adequate protection.
a). If your bra has sticky side panels that extend underneath your arms, get the cup into place first and then smooth down the side panel so it’s flush against your skin.
b). If your bra has detached cups, keep in mind that the further away the cups are from one another, the greater cleavage you’ll have once the clasps are connected.
c). If you’re having trouble with the placement, just take a deep breath, peel off the cup, and try again! It won’t hurt anything to reapply the cup several times until you get it where you want it.
6. Connect the front clasp or ties if your bra has that function. Gently pull the clasps toward each other and secure them into place. Many brands have clasps that simply hook into each other to provide the most security. If there are ties or a corset-type situation, you’ll need to pull the ties as tight as you want them and secure the ends with a knot.
a). Some backless bras come with ties so you can make adjustments to the size of your cleavage. A looser tie means less cleavage, and a tighter tie means more cleavage.


