
Silicone Bra Cup Construction: Molding and Edge Sealing
Most silicone bra cup complaints that reach a retailer are not material failures but tooling and bond failures. A cup can use premium platinum-cure silicone and still lift at the rim after a dozen wears, because the flange was sealed with a cheap adhesive and never post-cured. Construction is the part of the specification hardest to judge from a sample and most expensive to fix once production starts. This guide covers molding, edge sealing in volume, and purchase order language.
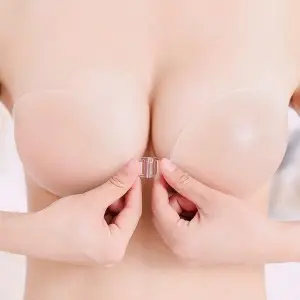
How a Silicone Cup Is Molded
Volume production uses one of two routes. Compression molding starts with a pre-weighed two-part platinum-cure compound, usually Shore A 20 to 40, degassed under vacuum and pressed into a heated cavity. Liquid silicone rubber injection meters and mixes at the nozzle and cures in seconds rather than minutes, giving tighter wall repeatability and lower labor content at a much higher tooling and order cost. Below a few thousand units per size, compression molding is normally the better commercial fit.
Three molding details decide whether a cup feels like a cup or like a rubber coaster. Cavity finish, because tool marks on the inner face transfer to skin. Venting, because trapped air creates voids that only appear after demolding. Demold temperature, because pulling a cup too hot causes shrinkage that shows up as a warped rim. Ask for the cure schedule and demold temperature in writing, not just the durometer.
Wall Thickness and the Thickness Map
A single thickness number is not a specification. Cups are designed with a thickness map: a thinner apex for feel and drape, a mid-wall that carries the shape, and a heavier rim that provides anchorage and gives the seal something to bond to. Typical bodies run 0.8 mm to 2.0 mm, with the rim often 0.3 mm to 0.6 mm thicker. Buy the map as a drawing with measurement points, and check five points per cup with a digital gauge. Plus or minus 0.15 mm is realistic for compression molding; anything tighter should be quoted as injection. Thickness spread drives the most common field complaint here, a cup that fits on one side and gapes on the other.
Edge Sealing Methods Compared
The edge is where a cup is judged. Three sealing approaches dominate, and they behave very differently in wear and in wash.
- Platinum-cure silicone adhesive bonding. Two cured or semi-cured surfaces are joined with an addition-cure adhesive and post-cured under pressure. Highest peel strength and best resistance to body oils, at the cost of a secondary oven step.
- Overmolded or integral rim. The flange is formed in the same mold, so there is no bond line at all. The most durable option for repeated washing, but it needs a more complex tool and limits how thin the rim can be.
- Solvent-based or pressure-sensitive tape. Fast and cheap, common on disposable SKUs. Peel strength is adequate at first and then falls away, and residual solvent can cause odor or skin sensitivity. Ultrasonic welding does not work on cured thermoset silicone, so treat it as a red flag.
Whichever route you choose, put the adhesive cure type and post-cure conditions in the specification. A bond that is never post-cured keeps creeping under body heat, and the rim lifts within weeks.
What a Sealed Edge Must Pass
Define acceptance by test, not by appearance. A workable protocol for a silicone cup program includes:
- Peel test on a cut strip, reported in N per 25 mm, with a stated pass value and sample size.
- Immersion test: submerge the sealed cup for 24 hours, then inspect the bond line for water ingress or clouding.
- Wash durability: 10 cycles in a defined detergent and temperature, then re-test peel and check for edge lift.
- Visual limits: flash at the parting line below 0.2 mm, no adhesive squeeze-out past the flange, no air entrapment against a light box.
Tip: Reject any quotation that states a peel value without stating the test method, sample width, and cure state of the parts tested, because the number cannot be compared across suppliers.
Tooling, Cycle Time and Cost Logic
Cost is driven by cavity count, cycle time, and trim loss far more than by silicone price per kilogram. A four-cavity compression tool on a five-minute cycle yields roughly 48 parts per hour before scrap, and trimming plus inspection can consume as much labor as molding. Injection tools with 8 or 16 cavities cut unit labor but raise the break-even volume. Request the cavity count, cycle time, and yield assumption behind a price, and confirm tool ownership before you commit.
Failure Modes to Watch in the Field
Four defects account for most returns. Edge lift appears first at the top of the cup and points to insufficient post-cure. Delamination at the rim shows as a whitish line and usually traces back to surface contamination before bonding. Yellowing over months indicates a tin-cure or under-cured system. Warping after packaging comes from demolding hot and stacking parts before they relax. All four are prevented at the tool and the oven, which is why in-process controls at molding and sealing matter more than final visual inspection.
FAQ
Is a thicker cup always more durable? No. Durability comes from rim design and bond quality, not wall thickness.
Can one tool cover several sizes? Not for the cup body, but rim geometry and flange width can often be shared across adjacent sizes, which lowers tooling cost.
What sample quantity is meaningful? At least 30 pieces per size from a production run, not from the tool trial, so thickness spread and bond consistency can be assessed.
Related Pages
Different Types of Silicone Nipple Covers Explained for Buyers
What Is a Silicone Nipple Cover? A Guide for Wholesale Buyers
Why Private Label Silicone Nipple Covers Are a Profitable Opportunity
Top Reasons Retailers Should Add Silicone Nipple Covers to Their Portfolio
Post time: Nov-18-2026